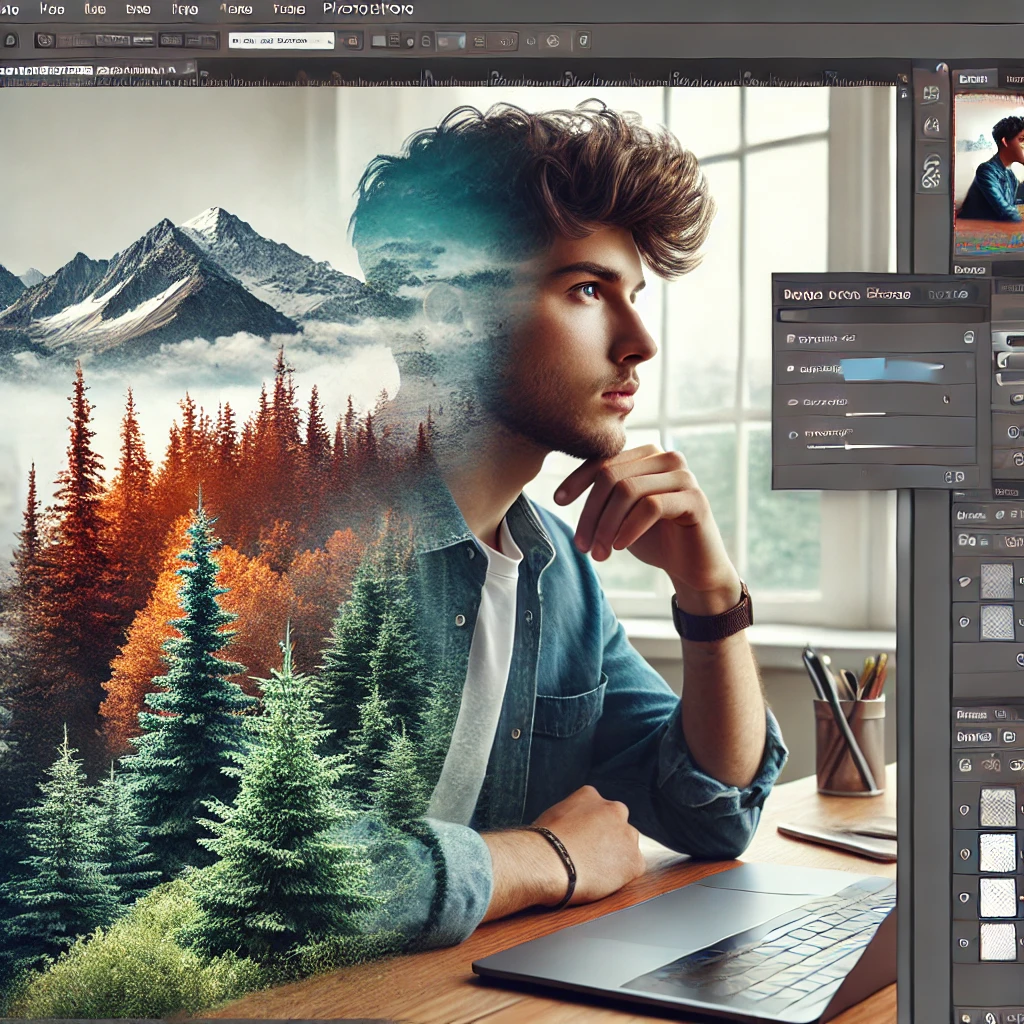
Double exposure is a captivating photo editing technique that blends two images to create surreal and artistic visuals. Adobe Photoshop offers powerful tools to create stunning double exposure effects with precision and creativity. This guide will walk you through the process step-by-step.
1. Choose the Right Images
Select two images that complement each other. Typically, a portrait pairs well with landscapes or textures.
Tips:
- Use a high-contrast portrait on a plain background.
- Choose a secondary image with strong shapes or textures.
2. Prepare the Base Image (Portrait)
Clean up and isolate the subject.
Steps:
- Open the portrait in Photoshop.
- Use the Select Subject or Pen Tool (P) to cut out the subject.
- Apply a Layer Mask to remove the background.
3. Place the Secondary Image
Blend the secondary image with the portrait.
Steps:
- Drag the second image into the document above the portrait layer.
- Right-click and select Create Clipping Mask to blend it with the portrait.
- Adjust the size and position using Free Transform (Ctrl+T).
4. Blend Images with Layer Modes
Experiment with blending modes to merge the images artistically.
Suggested Blending Modes:
- Screen for lighter effects.
- Overlay for contrast.
- Multiply for darker compositions.
5. Use Layer Masks for Refinement
Control how the images blend together.
How to Apply:
- Add a Layer Mask to the secondary image.
- Use a soft Brush Tool (B) with black to hide or white to reveal parts of the image.
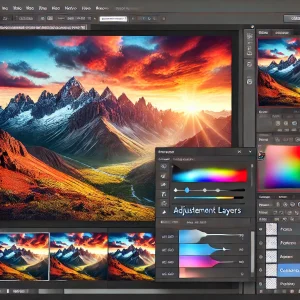
6. Adjust Colors for Harmony
Ensure both images share a cohesive color scheme.
Tools to Use:
- Hue/Saturation Adjustment Layer to match colors.
- Gradient Map for creative color grading.
- Color Balance to fine-tune tones.
7. Add Textures and Overlays
Incorporate textures for depth and complexity.
Examples:
- Use Smoke, Clouds, or Grunge textures.
- Set textures to Overlay or Soft Light blending modes.
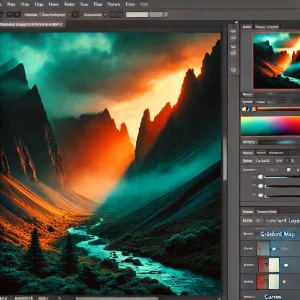
8. Apply Gradient Maps for Mood
Gradient maps can add atmosphere and mood to the composition.
How to Use:
- Add a Gradient Map Adjustment Layer.
- Choose gradients that complement the mood (e.g., warm tones for sunsets).
9. Add Light and Shadow Effects
Enhance realism with light and shadow.
Steps:
- Create a new layer for light spots using a soft Brush Tool (B).
- Add Drop Shadows for depth.
10. Final Touches and Export
Polish the image and export the final design.
Finishing Steps:
- Adjust Brightness/Contrast for balance.
- Flatten the image if needed.
- Export as JPEG or PNG for sharing.
Conclusion
Double exposure effects in Photoshop allow endless creative possibilities. By mastering blending modes, layer masks, and color adjustments, you can create visually stunning and thought-provoking images.